The Best Natural Remedies to Prevent Scars
Aiden van WykNot every incident deserves a story.
But the moment there's a scar, everybody around goes:
What happened there? What happened there? What happened there?
Now - I don't know about you but I'd rather not have to repeatedly explain how I knocked my head running into a sliding door - I'm a bit clumsy, and probably shouldn't be running :)
Why do we get scars?
When your skin is injured, your body begins a wound-healing process to repair the damage. Instead of regenerating skin exactly as it was before, you create scar tissue, which has a different structure and composition than normal skin.
The healing process is done in three phases:
- Inflammatory Phase:
After a wound is made, your body is trying to stop the bleeding and fight infection. Your body does this by releasing histamine (creating swelling and increasing amount of blood vessels to the wound), releasing platelets (stops the bleeding) and releasing leucocytes (fights infection). - Proliferative Phase:
In this stage Fibroblasts, a type cell found in the layer below the skin's surface, becomes activated and secretes collagen. This forms new tissue. Blood vessels are also growing into this new tissue, supplying oxygen and nutrients to the developing tissue as it strengthens. - Remodeling phase:
This is when the scar matures and reorganizes, becoming hardened and fibrose. The skin never fully regains the original skin's flexibility or strength. Over time, the scar may fade but remains structurally different from normal skin.
Why are scars hard?
Physiologically, scars are harder because your skin now has denser collagen than the standard elastin in normal skin. This is better for us because after a scar has fully healed, the skin at the injury site remains weaker and more vulnerable compared to unscarred skin. Even after a year of healing, it regains only about 80% of its original strength.
Acne Marks and Scars
Before getting into acne scars, it's important to address active acne first. Without controlling breakouts, new scars may continue to form, making treatment a challenge.
As you would expect, there are a wide variety of types of acne marks and scars, and therefore the best first step in formulating a treatment is to identify and understand what varieties you are dealing with.
Post Inflammatory Erythema - Red Marks
This is when the skin has significant redness remaining where the acne was. If there is no change to the skin itself, this tends to get better on its own over a few months.
Products that can help heal this is anti-inflammatory products like Honey and Niacinamide, healing products like Gotu Kola and Retinoids.
Did you know that some products for Erythema contain green iron oxide? This is because green is opposite red on the color wheel, neutralizing redness in skin and making it appear more even-toned.
Post Inflammatory Pigmentation - Dark Spots
This is when the skin is hyperpigmented (i.e. darker) where the acne was. Occasionally these fade naturally over six months.
Because this is pigment problem, what you can do to help heal this quickly is increase cell turnover, exfoliate the skin and decrease pigment production. Helpful products would be any product that generally counters hyperpigmentation like:
- Retinoids
- Bakuchiol
- Niacinamide
- Vitamin C
- Azelaic Acid
- Glutathione
- Kojic Acid
- Liquorice Root
- Turmeric
For treating both acne and dark spots, Azelaic Acid and Retinoids works best.
Hypopigmentation - Light Spots
The word "hypo" in a medical context means "deficient" or "below normal". In dermatology, Hypopigmentation refers to areas of skin that appear lighter than the surrounding skin due to a reduction in melanin production.
When acne is inflamed, it can damage melanocytes (the pigment-producing cells), leading to temporary or permanent light spots. Often this fades over time, but if the Hypopigmentation persists after a year, it becomes difficult to reverse. While some advanced treatments, like melanocyte transplants exist, they are highly specialized procedures typically performed by plastic surgeons and are more commonly used for conditions like vitiligo.
Atrophic Acne Scars - Face Pits
When you think of acne scars - this is probably what you think of. Scars that dip into your skin. This happens for multiple reasons, including:
- Personal circumstances like genetics, skin quality, and how you took care of your acne.
- Severely inflamed acne can cause significant damage to the deeper layers of the skin. The intense inflammation breaks down collagen fibers, impairing the skin's ability to fully regenerate, which results in pits instead of smooth, healed skin.
Note: Acne becomes more inflamed the more you pick on it and squeeze it, so please try to avoid popping your pimples. Particularly if it does not have that white head on top. - Depressed scars tend to form when the skin doesn't produce enough collagen during the healing process. If the body is unable to generate enough collagen to fully repair the area, the shrinking wound leaves behind what looks like a hole.
Many over-the-counter products don't penetrate the skin deep enough to really counteract atrophic scars, with the main methods for treating these types of scars being:
- Chemical Peels: Medically significant chemical peels, particularly for Ice Pick scars, are applied with precision to stimulate collagen production and promote healing. Given their intensity, these treatments should be performed by a medical professional for safety and effectiveness.
- Subcision: Subcision is when a medical professional uses a needle under the skin to release the scar tissue and help it regenerate. This procedure is ideal for boxcar or rolling scars and is typically done multiple times over six months.
- Microneedling: Microneedling encourages collagen production, but for deeper scars like boxcar or rolling scars, the needling depth must be between 1.5mm - 2mm. This is quite deep and should only be done in a surgical environment.
- Laser Treatments: Laser treatments stimulate collagen production, improving scar appearance. These treatments, however, may not be suitable for all skin types and tones.
Traumatic Scars
Scars caused by your environment, like cuts, burns or general injury are referred to as traumatic scars. Often when the scar doesn't penetrate the skin too deeply, it would heal seamlessly over a couple of weeks.
Other times, the trauma makes it necessary for your body to go through a more complex healing process. How your body responds to the trauma could go three ways:
Hypertrophic Scars
Remember when we said "Hypo" means deficient, well "Hyper" means "excessive". In dermatology, Hypertrophic Scars means that your scar was overstimulated and produced too much collagen. What this looks like is a raised scar that is larger than the original wound but nevertheless remains within the boundaries of the original wound.
Keloid Scars
This is when, similarly to hypertrophic scars, instead of stopping when the skin is healed, the body keeps making collagen. What makes Keloids identifiable is that it grows beyond the original wound, often bubbling up and growing back if you try to cut it off.
Contracture Scars
This scar is usually over joints and in places of movement, like elbows, that painfully start to contract and tighten. This is more common with burn scars and if the Scar is deep, it may also affect the muscles and nerves underneath.
An easy way to counter this is to, after a month: Massage the scar. It's not necessary to get a masseuse or professional, as you could by using your thumb and a healing oil as lubrication. Feel if the scar hardened. Gently massaging it down, breaking it up slightly, allowing it to integrate with your skin without forming a hard lump.
When to see a Dr
Often, we can deal with cuts and scrapes at home, but sometimes medical attention is necessary - whether that be stitches or a surgical cleaning. Please do see a Dr if you have:
Deep wounds that:
- Expose bone, muscle, or fatty tissue
- Are deeper than a centimeter
- Have edges that gape open
- Are on the face (to minimize scarring)
Wounds with complications:
- Heavy bleeding that doesn't stop after 10-15 minutes of direct pressure
- Signs of infection (increasing redness, warmth, swelling, pus, or fever)
- Dirt that can't be easily cleaned out
- An injury that is the result from rusty or dirty objects (a tetanus risk)
- Are from animal or human bites
Special Circumstances:
- Wounds in people with diabetes / compromised immune systems
- Wounds over joints or in areas that affect movement
- Large or severe burns
- Wounds from high-pressure injuries
- Other relevant but not mentioned special circumstances.
Location-specific concerns:
- Wounds on hands or feet (risk of function impairment)
- Wounds near vital areas (head, neck, chest, abdomen)
- Wounds crossing eyebrows or lips (require precise alignment)
What not to do to Prevent Scarring
When I ran into the sliding door, my grandma put cold butter on my forehead - though I do suspect that was just to make me sit still :)
More common responses to a cut include:
- Let it "air dry" / dry out.
- Clean it with Alcohol - Constantly.
- Clean it with Hydrogen Peroxide.
If there's one thing that you learn from here - it's don't do that.
The best healing is done when your wound is moist and fully occluded.
Using harsh cleansers will kill germs, yes, but also kill your helpful cells. While a potent antibacterial can be useful immediately after a wound happens, your normal cleansing should be done with either a salt water solution or a gentle, non-irritating soap and warm water to support the healing process.
A final tip on how not to exacerbate a scar: avoid exposing it to the sun, particularly without sunscreen. Scars are especially prone to hyperpigmentation, so it's essential to protect them with sunscreen to prevent future dark spots.
How to Prevent Scarring
How your body scars are largely influenced by your genetic predisposition and age. However, to have the best chances of normal healing, focusing on the Phases of Scarring can help guide your recovery.
- Inflammatory Phase: First Two Weeks after Trauma
Prioritize hydration, moisture, and wound nourishment while keeping the area clean to prevent infection.
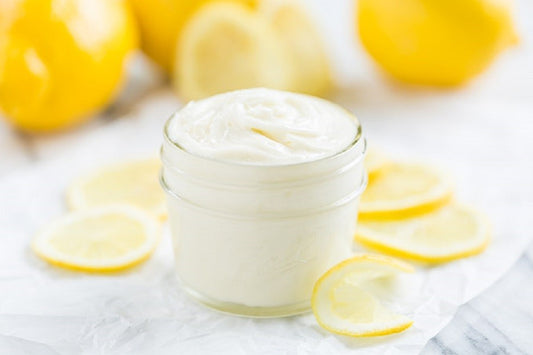
A great partner in this would be wrapping your scar with a Vaseline Dupe formulated with antibacterial oils to protect the wound. When making a Vaseline dupe, choose highly nourishing oils (like Tamanu, Rosehip, Sea Buckthorn, Pomegranate and Sunflower) to support skin repair.
- Remodeling Phase: From Two Weeks to Six Months after Trauma
Focus on scar management with ingredients like silicone scar gel, honey, niacinamide, retinols and onion extract, which help reduce scar formation and improve skin texture. Natural Sources of Silica include Horsetail, Nettle Leaf and Oat Straw (tips on Extracting Silica and Onion further down).
At this point you may want to consider retinoids as they can help remodel scars and hyperpigmentation that can occur around scars.
- Remodeling Phase: From Six Months to a Year after Trauma
More advanced treatments like radiation therapy, chemical peels, and laser treatments may be considered to refine and improve the appearance of persistent scars.
Why do we wrap scars in Bandages?
The body is intelligent and constantly detecting the boundaries for growth. When wrapping a scar, the gentle pressure from bandages signals the body to not overproduce collagen, control healing and reduce the likelihood of a raised scar. Bandages also help keep the wound moist and protected, which speeds up healing and nourishes the tissue involved in healing.
Can Mature Scars be completely healed naturally?
That depends on what you mean by completely healed. If you mean that the scar tissue is identical to normal skin - then no. Almost no process can return your skin to normal after scarring, particularly after the scar matured.
This is because a mature scars':
- Collagen is densely packed and less flexible.
- Blood flow has reduced (making remodeling more difficult).
This limits your skin's ability to break down and replace scar tissue.
Scar tissue becomes a permanent part of your skin and will always have a different texture, but you can still soften, fade, and improve its flexibility and appearance over time.
Products that help fade scars:
- Chemical Peels: Helps resurface and fade scars.
- Silicone Patches: Keeps skin hydrated and softens scars over time.
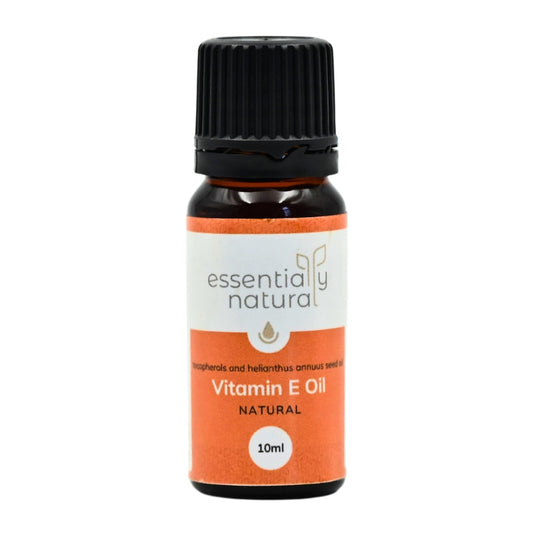
- Vitamin C and Ferulic Acid: Helps brighten dark scars and boost collagen turnover.
- Retinoids: Retinoids can help remodel scars and hyperpigmentation that can occur around scars
- Rosehip and Tamanu Oil: Regenerates skin and fades pigmentation.
- MSM (Methylsufonylmethane): Enhances tissue repair and flexibility.
- Onion Extracts: Surprisingly, onion was to found to be helpful in the healing of scars and assisting in collagen production.
- Gotu Kola: Stimulates collagen remodeling and fibroblast activity.
- Horsetail: Supports collagen structure.
- Raw Honey: Highly moisturising, selectively inflammatory, stimulates colllagen and is anti-microbial.
For best results, combine these with scar massages or professional dermatological treatments to further support healing.