
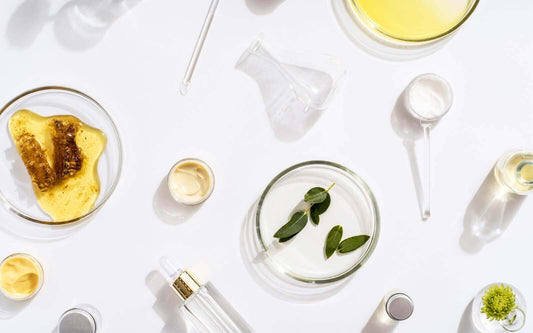
Setting Up Your DIY Lab
Juliette van der MeerWe are often asked by people who are first starting out their DIY formulation journey:
"What do I need in the equipment department?"
Whether you are a casual DIY-er or starting a small business making products for sale, you will need some utensils to make your life easier.
Formulation utensils do not need to be a big expensive outlay. You can use many things you might already have at home, and just invest in a couple of items to get started. You can always build up your collection as you go as well. A home lab can be as simple or as fancy as you like.
Here is a checklist for you to get your 'laboratory' going:
What is Absolutely Necessary in a Lab?
Although it does depend to a degree on what types of products you are making, here are some essentials that you will use all the time. We highly recommend that you have the following:
Beakers:
Ultra handy! You will probably want to get a range of sizes. You will be using these every time you make anything. I love the small ones for measuring and melting small amounts of ingredients, and the larger ones for mixing/blending in.
Stirring Rod:
Something to stir with.
pH strips:
You will need these to measure the pH of skincare products and shampoos to make sure they are suitable for skin.
A scale:
You can get away with making use of volumetric measurements instead of weights; but if you want to be more professional or if you are following a more technical formula then do invest in a good scale that has at least a 0.1g precision (preferably 0.01g precision if you can get).
Containers/packaging:
To put your finished product in.
If you are planning on making any infusions or need to filter or pour anything, we recommend:
A funnel:
Mostly used in a filtration setup along with gauze filter swabs, but it is also obviously a great tool to pour with and takes away all the spillage and mess.
Gauze filter swabs:
You can layer 3 filters cross threads to one another and line the funnel with them, and this setup makes the perfect filter to filter out even fine sediments. If you need to filter extremely fine sediments then simply use an extra swab or two. We found filter swabs to be better than filter paper, plus they are cotton and biodegradable.
PPE (personal protective equipment):
Very important when working with any corrosive ingredients such as lye in soap making or acids in skincare.
Latex Gloves:
Get some thick latex gloves for when making soap; this is absolutely imperative or you will give yourself a chemical burn.
Safety goggles:
For soap making to protect your eyes.
Apron:
To protect your clothing from any spatter.
If you are making soaps or bath bombs you will need some soap molds or bath bomb molds.
Not Absolutely Necessary But Nice to Have:
- A good thermometer is necessary if you are making soap. I don't find it necessary when making lotions but you could use it if you wanted to.
- Pipette to accurately measure.
- Chattaway spatula: nice to use to measure out powders and small amounts of ingredients.
Things You Could Use From The Kitchen:
- Some small and large bowls always come in handy, as well as glasses or cups. Inevitably you will find yourself doling out your product to test, experiment with or store. If you don't have enough beakers then a bowl or cup might work.
- A mixing bowl to blend up larger amounts of product such as lotions or shampoos.
- A good old dessert spoon. Where would we be without this!
- If you have a funnel at home you can use it instead of the glass funnel listed above. But then don't use it for food prep afterwards!
- A silicone spatula - try to get the mini ones. Silicone spatulas are great for scraping out bowls and beakers so nothing goes to waste.
- A heat source: a bain marie (water bath) setup is best but you can get away with using a microwave if you are careful.
- A mixer/blender: A soup blender that comes with a whisk function as well is perfect. If you don't have a dual function blender then make sure you have a soup blender as a basic.
- An apron to protect your clothing from any spatter.


3 comments
Hi Faye, so glad you like our blog! We post it on our social media pages, in our email newsletters and of course here on our website, so stay tuned!
how do i join a blog to get more information please ,
your site is really helpful
Thank you so much for this posted was really interesting.
Will like to join your blog to learn more.
Thanks